

Table of Contents
- What Is Hard Water?
- Signs of Hard Water in Your Home
- Why Test Your Home Water?
- How to Test Water Hardness at Home
- Understanding Water Hardness Levels and Grains Per Gallon Chart
- Water Hardness Test Kit Accuracy and Reliability
- Interpreting Your Test Results and Next Steps
- Conclusion
- Frequently Asked Questions
Last Updated: September 4, 2026
What Is Hard Water?
Hard water is water that contains high concentrations of dissolved minerals, primarily calcium and magnesium. As rainwater moves through soil and rock, it picks up these minerals, which remain suspended in your tap water. The U.S. Geological Survey notes that hard water is common across much of the country, especially in regions with limestone and chalk deposits U.S. Geological Survey water hardness information.
The hardness of your water is measured in grains per gallon (GPG) or parts per million (PPM), also expressed as milligrams per liter. One GPG equals roughly 17.1 PPM. Water is typically classified as soft below 1 GPG, slightly hard from 1 to 3.5 GPG, moderately hard from 3.5 to 7 GPG, and hard above 7 GPG (usgs.gov). If you live in Kansas or Oklahoma, there’s a strong chance your water falls into the hard or very hard category given the region’s geology.
Understanding how to test water hardness at home starts with knowing what you’re measuring. This guide explains the practical methods for determining your water’s mineral content so you can make informed decisions about treatment. We’ll walk through simple DIY approaches, professional testing options, and how to interpret your results, along with signs of hard water to watch for.
Signs of Hard Water in Your Home
Before you run any tests, your home may already be telling you it has hard water. Common signs of hard water include white, chalky scale accumulation on plumbing fixtures and faucets, spotty dishes and glassware that won’t dry clean, and dry, itchy skin or dull hair after showering. You might also notice that soap and shampoo don’t lather well, leaving a film on your skin.
Soap scum is another telltale indicator. When hard water minerals react with soap, they form a sticky residue that builds up on tubs, tiles, and shower doors. Mineral buildup inside pipes and water heaters can reduce water pressure and shorten the lifespan of appliances.
Limescale on your coffee maker or kettle is one of the most obvious clues. If you’re regularly descaling appliances or scrubbing white deposits off fixtures, your water is likely hard. These symptoms aren’t just cosmetic. Scale accumulation inside water-using appliances forces them to work harder, which can increase energy consumption and lead to premature failures.
Why Test Your Home Water?
Testing your water hardness gives you concrete data instead of guesswork. Knowing your exact GPG level helps you choose the right water treatment solution, whether that’s a simple filter pitcher or a whole-home softening system. Without a baseline measurement, you risk either ignoring a real problem or overspending on equipment you don’t need.
Hard water also has health-adjacent implications worth understanding. While calcium and magnesium aren’t harmful to drink, the mineral content affects your water’s total dissolved solids (TDS) level, which influences taste and how well your body’s products like soap perform. The Environmental Protection Agency sets secondary standards for these contaminants based on aesthetic effects rather than health risks EPA Secondary Drinking Water Standards.
For homeowners considering a water softener, testing first is essential. Oversized systems waste salt and water, while undersized units won’t adequately treat your supply. Testing also helps you track whether your water quality changes seasonally, which is common for well water users who may see hardness fluctuate with rainfall and groundwater levels.
How to Test Water Hardness at Home
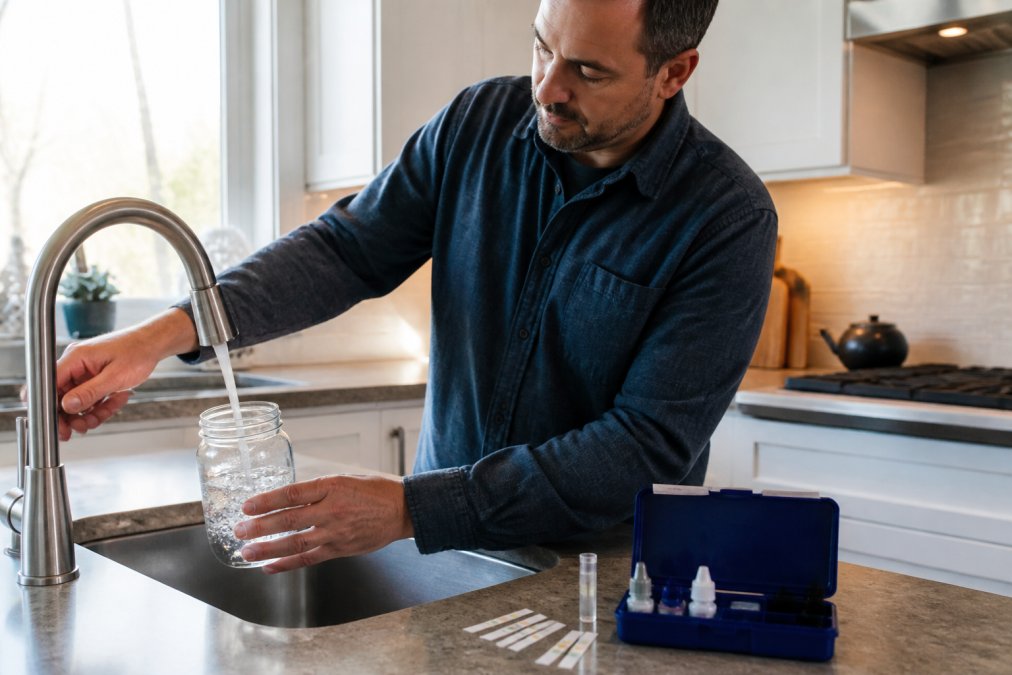
Testing your water hardness at home is straightforward and requires no special expertise. The three primary methods are water hardness test strips, a DIY soap test, and professional laboratory analysis. Each approach offers different trade-offs between cost, speed, and accuracy. Below, we’ll show you exactly how to perform each method and what the results mean.
Method 1: Using Water Hardness Test Strips
Test strips are the most accessible option for most homeowners. These disposable strips contain reagent pads that change color based on mineral concentration. You can find them at most hardware stores, online retailers, or through water treatment companies.
To use them properly, follow these steps:
- Fill a clean glass with cold tap water, avoiding the aerator if possible.
- Dip the test strip into the water for the time specified on the package, typically 3 to 5 seconds.
- Remove the strip and hold it level for the recommended waiting period, usually 30 to 60 seconds.
- Compare the color of each pad to the chart on the package.
- Record your results immediately, since colors can shift as the strip dries.
The main limitation of test strips is resolution. Most strips provide a range rather than an exact measurement, such as “soft to moderately hard” or “7 to 10 GPG.” For basic decisions, this level of detail is usually sufficient. For precise readings, you’ll need a more rigorous method.
Method 2: The DIY Soap Test
The soap test is a quick, zero-cost way to get a rough sense of your water hardness. It relies on the principle that hard water inhibits soap from lathering. Here’s how to conduct it:
- Fill a clear bottle or jar with about 6 ounces of tap water.
- Add 10 drops of pure liquid soap. Avoid detergents or moisturizing soaps, which contain additives that affect results.
- Cap the bottle and shake vigorously for 10 seconds.
- Observe the suds. If you get a rich, fluffy lather, your water is relatively soft. If the water turns cloudy or milky with minimal suds, you likely have hard water.
- Add 10 more drops and shake again. If suds appear after additional soap, your water is moderately hard. If it takes many drops to produce any lather, hardness is high.
This method gives you a qualitative answer, not a number. It’s useful as a preliminary check, but it cannot tell you whether your water is 8 GPG or 15 GPG, which matters when sizing treatment equipment. Use it as a screening tool, then follow up with a more precise test.
Method 3: Professional Laboratory Testing
For the most accurate results, professional laboratory analysis is the gold standard. You collect a water sample at home and mail it to a certified lab, which performs titration or other quantitative methods to measure hardness precisely. This approach also screens for other water quality issues like iron, manganese, or bacteria.
Collection technique matters for lab accuracy. Use a sterile container provided by the lab or a clean bottle. Run cold water for 2 to 3 minutes before sampling to flush stagnant water from your pipes. Fill the container to the indicated line, cap it tightly, and ship it according to the lab’s instructions. Most labs deliver results within one to two weeks.
Professional testing costs more than strips, but the detailed report is valuable if you’re considering a significant investment in water treatment. Many water treatment companies also offer free in-home water analysis, which combines lab accuracy with on-the-spot interpretation.
Understanding Water Hardness Levels and Grains Per Gallon Chart
Once you have your test results, you need a reference to interpret them. The grains per gallon water hardness chart below shows standard classifications and what each level means for your home.
| Hardness Level | GPG Range | PPM Range | Household Impact |
|---|---|---|---|
| Soft | 0-1 GPG | 0-17 PPM | No noticeable effects |
| Slightly Hard | 1-3.5 GPG | 17-60 PPM | Minor spotting on glassware |
| Moderately Hard | 3.5-7 GPG | 60-120 PPM | Scale buildup on fixtures, reduced lather |
| Hard | 7-10.5 GPG | 120-180 PPM | Frequent descaling, soap scum, dry skin |
| Very Hard | 10.5+ GPG | 180+ PPM | Significant scale in pipes, appliance damage |
Water in the “hard” or “very hard” categories typically warrants a water softener. If your results fall in the moderately hard range, your decision depends on how bothered you are by the symptoms and whether you have appliances at risk of scale damage.
Water Hardness Test Kit Accuracy and Reliability
Water hardness test kit accuracy varies significantly by method. Test strips are convenient but have the highest margin of error, often reading within 1 to 2 GPG of the true value. This variance stems from factors like reading the color chart under different lighting or waiting too long before comparing results.
The DIY soap test is the least accurate, serving mainly as a binary indicator of whether hardness is present. It cannot distinguish between 5 and 15 GPG, which limits its usefulness for equipment sizing.
Professional lab testing delivers the highest accuracy, with results precise to fractions of a GPG. The trade-off is time and cost. For most homeowners, a hybrid approach works best: use test strips for routine monitoring and a professional test before making major purchasing decisions.
One common pitfall is testing water that hasn’t been fully flushed. Stagnant water in pipes can produce misleading results, especially for well water systems. Always run the tap for several minutes before collecting a sample. Also, test cold water only, since heating can concentrate minerals and skew your reading.
Don’t rely on a single test strip reading to make a major decision. Colors can be misread, and batches of strips occasionally expire or degrade. Run two or three tests on different days and average the results before choosing treatment equipment.
Interpreting Your Test Results and Next Steps
Your test results point to a clear set of next steps. If your water measures below 3.5 GPG, you may not need any treatment, though you might still address taste issues with filtration. Between 3.5 and 7 GPG, a softener could be justified if you’re experiencing noticeable symptoms. Above 7 GPG, a water softener is generally recommended to protect plumbing and appliances.
Troubleshooting false readings is worth understanding. If your results seem inconsistent between tests, check whether you’re using the same water source each time. Well water hardness can fluctuate with rainfall, so test during a dry period for a baseline. Also, verify that your test strips haven’t been exposed to humidity, which degrades the reagent pads.
If your tests confirm hard water, the practical fix is a water softener. The team at Dooley’s Water has spent nearly two decades helping Kansas and Oklahoma homeowners address exactly this issue. As an authorized Kinetico dealer, Dooley’s Water installs non-electric water softeners and whole-home filtration systems tailored to your home’s specific hardness level. Their approach starts with a free water analysis, so you know precisely what you’re treating before any equipment is recommended.
A common mistake is buying a softener based on a neighbor’s recommendation rather than your own water test. Sizing depends on your GPG level, household size, and daily water usage. Equipment that’s too small will struggle to keep up, while oversized units waste salt and regenerate too frequently. An honest assessment of your actual hardness prevents both problems.
Conclusion
Testing your water hardness at home is a simple process that delivers important information about your water quality. Whether you use test strips for a quick check, a DIY soap test for confirmation, or professional lab analysis for precision, the data you gather tells you whether a water softener makes sense for your household.
The challenge most homeowners face isn’t running the test. It’s interpreting the results and choosing the right equipment from the many options available. That’s where experienced guidance matters. Dooley’s Water combines nearly two decades of hands-on expertise with honest, no-pressure advice to help you find the right water treatment solution for your home. Their free water analysis removes the guesswork, and their Kinetico systems deliver energy and cost savings through non-electric operation.
Get started with Dooley’s Water and schedule your free water analysis to see exactly what’s in your tap water.
Frequently Asked Questions
What are the signs of hard water in my home?
Common signs of hard water include white, chalky buildup (scale accumulation) on faucets and showerheads, soap scum on shower doors and tubs, spots on dishes after washing, dull and stiff laundry, dry skin and hair after showering, and a metallic or bitter taste in tap water. You may also notice reduced water pressure over time due to mineral buildup inside pipes and plumbing fixtures. If you’re experiencing several of these issues, testing your water hardness is the next step.
How accurate are home water hardness test strips?
Home water hardness test strips are reasonably accurate for general assessment, typically within 1-2 grains per gallon (GPG) of actual hardness levels. They work by detecting calcium and magnesium ions through a color-change reagent. However, they can produce false readings if the water sample contains chlorine or if you misread the color match. For the most precise measurement, especially before investing in a water softener, professional laboratory testing is more reliable and provides a complete water quality analysis.
What does grains per gallon mean on a water hardness chart?
Grains per gallon (GPG) is the standard measurement for water hardness in the United States. One grain equals 64.8 milligrams of dissolved minerals per liter. Water is generally classified as soft below 1 GPG, slightly hard 1-3.5 GPG, moderately hard 3.5-7 GPG, hard 7-10.5 GPG, and very hard above 10.5 GPG. Most homes in areas with hard water fall in the moderate to hard range. Understanding your GPG reading helps determine whether you need a water softener and what type of treatment system would be most effective for your household.
Can I test water hardness without buying a kit?
Yes. The DIY soap test requires only dish soap and a clear bottle. Fill a bottle halfway with tap water, add 10 drops of liquid dish soap, shake vigorously for 10 seconds, and observe the bubbles. Soft water produces thick, fluffy bubbles that last several minutes. Hard water produces few bubbles and cloudy water below. This method gives a quick qualitative result but won’t provide a precise GPG measurement. For actionable numbers to guide treatment decisions, you’ll need test strips or professional analysis.